
Japanese Milk Bread Mix – Detailed Baking Guide

Welcome to Japanese Milk Bread
Thank you for purchasing our Japanese Milk Bread Mix!
Japanese milk bread, also known as “Shokupan,” is loved for its incredibly soft texture, fluffy interior, and rich buttery flavor. Unlike traditional rustic breads, Japanese milk bread is light, tender, and slightly sweet, making it perfect for sandwiches, toast, French toast, or simply enjoying warm with butter.
This style of bread became popular in Japan for its cloud-like texture and beautiful pull-apart layers. The rolling and folding technique used in this recipe helps create the delicate layered structure that gives Japanese milk bread its signature soft interior.
Whether this is your first time baking bread or you’re an experienced baker, this mix is designed to help you create a bakery-style loaf at home.
Before You Begin
Included in This Box
Flour Mix: Our special blend for the perfect soft, bakery-style texture.Yeast
Pouch: Pre-measured for the ideal rise.
Sugar Pouch: Perfectly portioned for a touch of sweetness and to activate the yeast.
1 cup warm water (Tip: 105°F–115°F is best)
2 tbsp cubed, room temperature butter
1/2 tsp neutral oil
Extra butter, neutral oil, or non-stick baking spray (for greasing the pan)
Loaf pan (Recommended: 8.5 x 4.5 inch or 9 x 5 inch)
Large mixing bowl
Optional: stand mixer with dough hook
You Will Need
Avocado oil
Canola oil
Vegetable oil
Avoid strongly flavored oils, as they can affect the taste of the bread.
Recommended Oils
Understanding the Dough
Japanese milk bread dough is softer and more enriched than many traditional bread doughs. Because the dough contains butter, sugar, and milk powder, it may feel sticky, soft, or slightly oily during mixing.
This is completely normal.
Avoid adding too much extra flour. As the dough kneads, the gluten develops and the dough becomes smoother and more elastic.
The finished dough should feel:
• Soft
• Stretchy
• Slightly tacky
• Smooth and elastic
Instructions: Making the Dough
In a large bowl, combine warm water with the sugar pouch and yeast pouch. Stir gently and let stand for 5 minutes.
The mixture should look slightly foamy or creamy. This means the yeast is active.
Tip: Water that is too hot can kill the yeast. Warm water should feel comfortably warm, not hot.
Step 1 – Activate the Yeast
Add the flour blend to the bowl and mix until a rough dough forms.
Stand Mixer Method:
Using a dough hook, knead for 6 minutes on low speed.
By Hand Method:
Transfer dough to a lightly floured surface and knead for 8–10 minutes until the dough begins to smooth out.
At this stage the dough may still look rough or slightly sticky.
Step 2 – Mix the Dough
Add the cubed, room temperature butter gradually while kneading.
Stand Mixer:
Knead an additional 3–5 minutes.
By Hand:
Knead an additional 4–8 minutes until the dough becomes smooth, elastic, and slightly tacky.
Important: After adding butter, the dough may temporarily look greasy or fall apart. Continue kneading — this is normal and the dough will come back together.
To test the dough, gently stretch a small piece. If it stretches thin without tearing easily, the gluten is properly developed.
Step 3 – Add the Butter
First Rise
Place the dough into a bowl with 1/2 tsp neutral oil, cover it with plastic, and let rise for 1–1½ hours, until doubled in size.
The dough should look puffy and airy.
Rise times can vary depending on room temperature.
Shaping the Dough
This shaping technique helps create the soft pull-apart texture Japanese milk bread is known for.
Lightly flour your work surface and press down deflating the air bubbles in the dough.
Divide dough into 3 equal pieces and roll into balls.
Cover with a damp towel and rest for 15 minutes.
This resting period relaxes the gluten and makes the dough easier to shape.
Step 1
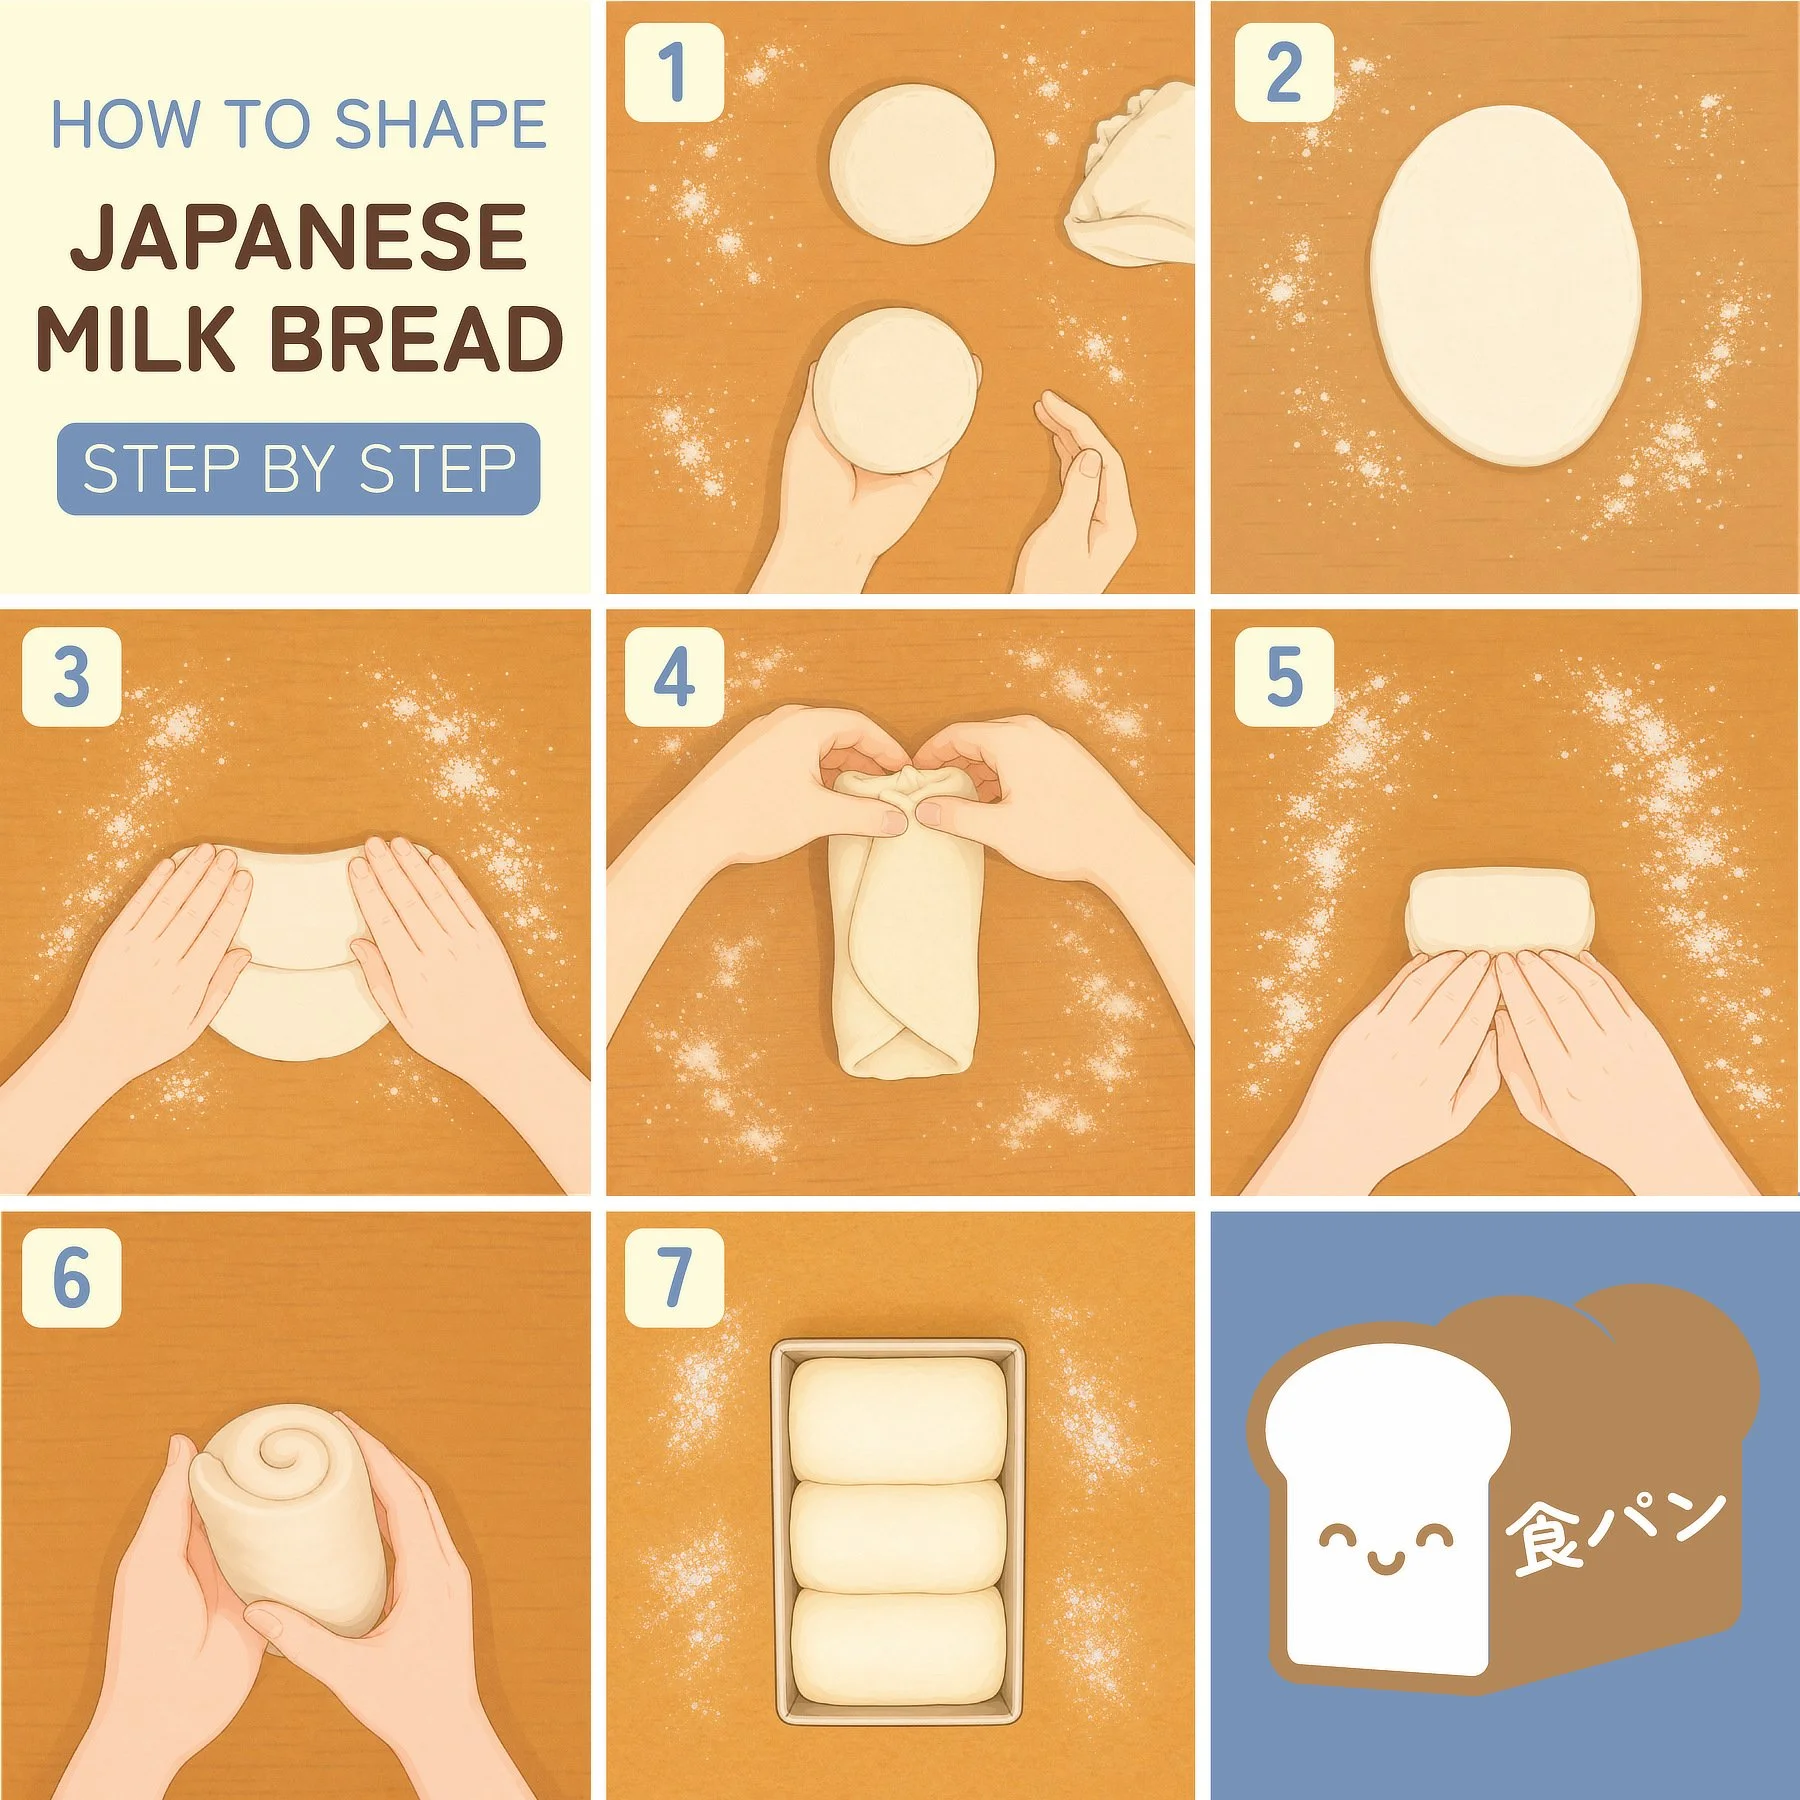
Roll one dough ball into a rectangle.
Fold the short ends inward toward the center.
Roll the dough out once more.
Starting from the short end, roll into a log.
Place into a greased loaf pan.
Repeat with remaining dough pieces.
The rolling and folding process helps build the light layered structure that gives the bread its soft, pull-apart texture.
Step 2
Final Proof
Cover the loaf pan and let the dough rise for 1 hour.
The dough should look noticeably puffy and rise close to the top of the pan.
Giving the dough enough time to properly proof helps create a lighter texture and allows the loaf to rise beautifully while baking.
Baking
Preheat oven to 425°F.
Lightly spritz the proofed dough with water just before baking.
Place loaf into oven and immediately reduce temperature to 385°F.
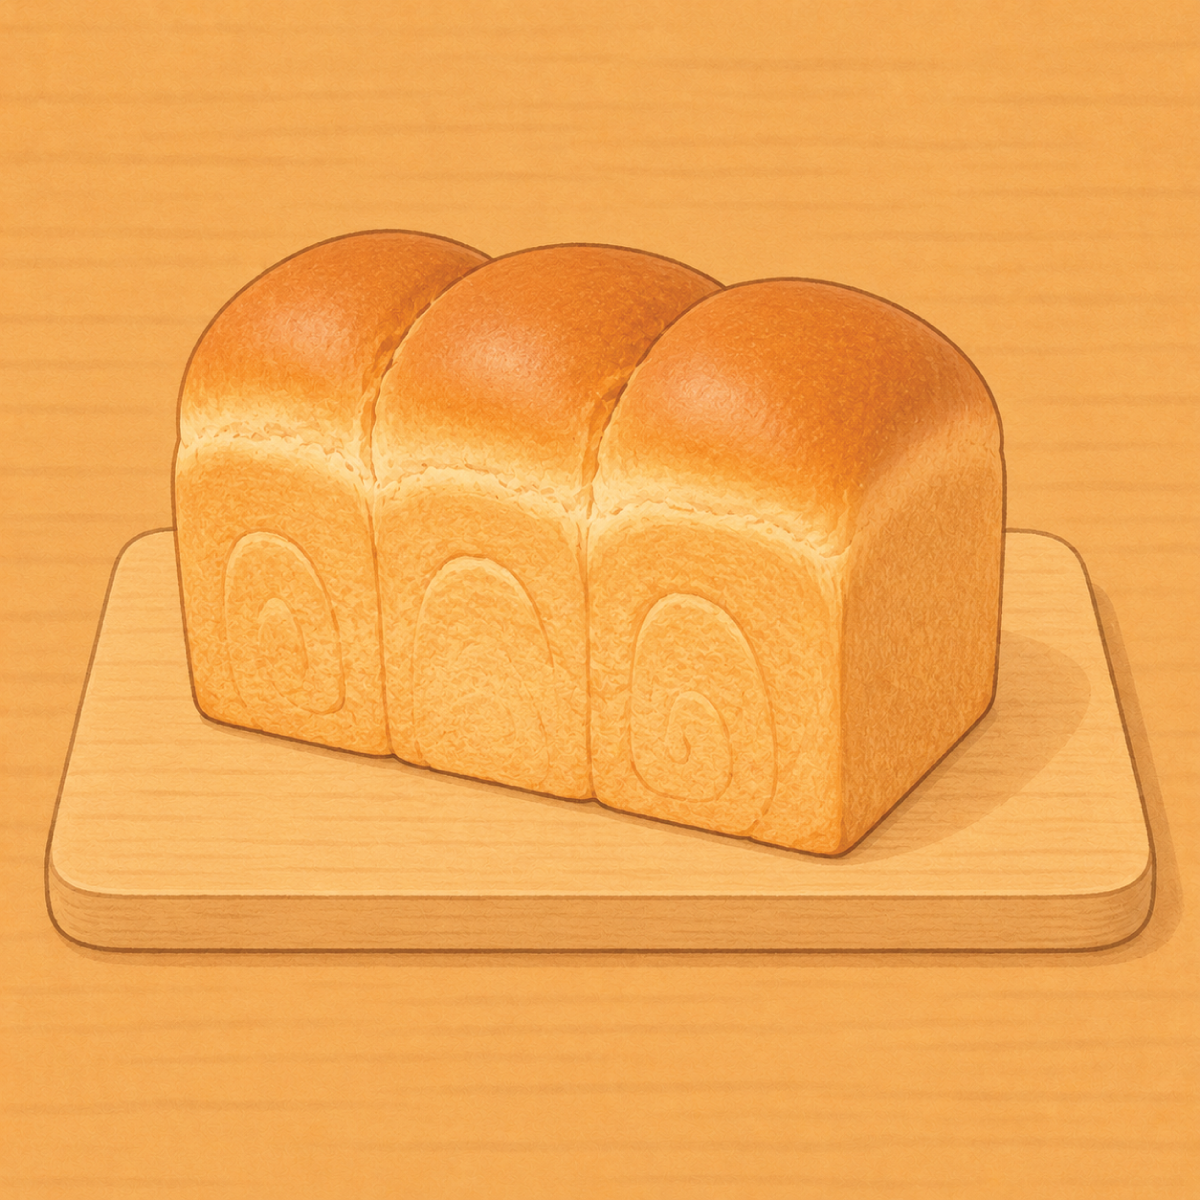
Bake for 30 minutes, or until the top is deep golden brown.
If the top browns too quickly, loosely tent with foil during the final part of baking.
Cooling
Allow bread to cool completely before slicing.
Cutting too early can compress the soft interior and make the loaf gummy.
For the best texture, wait until fully cooled.
Storage Tips
Store bread tightly wrapped at room temperature for 2–3 days
Freeze slices in an airtight bag for longer storage
Toast slices to refresh softness
Serving Ideas
Japanese milk bread is perfect for:
Toast with butter and jam
Sandwiches
French toast
Breakfast toast
Grilled cheese
Honey toast desserts
Cinnamon toast
Bread pudding
Tea sandwiches
Dessert toast with fruit and whipped cream
Troubleshooting
Dough Feels Too Sticky
This dough is naturally soft. Avoid adding large amounts of flour. Continue kneading first.
Dough Isn’t Rising
Yeast may be inactive or the room may be too cool. Move dough to a warmer area.
Bread Is Dense
The dough may need more kneading or additional proofing time.
Bread Browns Too Quickly
Loosely tent with foil during baking.
Enjoy your homemade Japanese Milk Bread!